ChilliSource Chip-8 Emulator
17 Mar 2015Getting started…
I’ve long wanted to write an emulator for one of my childhood consoles either the Master System, Mega Drive or Gameboy, and recently worked up the energy to get started on one. I had a rough idea how to create an emulator but rather than cracking on foolishly with a more complex console, most emulation sites recommend starting with a Chip-8 emulator - so that’s what I did.
Chip-8 is not a physical machine but a virtual machine with an interpreted language. It is a very basic machine with only 2 colour graphics, 4k memory, 16k stack, 17 registers, 2 simple timers and 32 opcode instructions. Chip-8 has none of the features found in more complex consoles such as interrupts, sprites, memory banking, etc; and is therefore a good machine to use to learn about emulation. There are also a few game available freely online such as: Pong, Space Invaders, Breakout and other classics.
I’m not going to write in-depth about how to create a Chip-8 emulator, as plenty of good information can be found online:
Instead I’ll write about how I used Chilli Source to create this and point out some of the areas that tripped me up.
Getting the timings right…
When emulating a system, it is vital that execution and update timings are spot on. Unfortunately the Chip-8 specs are pretty vague on what these timings should be. Lots of reading around suggests that the timers and screen refresh run at 60Hz and the CPU executes either 60 or 600 opcodes per second. Let me tell you, I tried running at 6o opcodes and it was like pulling teeth, so I’d recommend going with 600.
In Chilli Source it is pretty easy to regulate update speed to 6o FPS by setting 60 as the preferred FPS in App.config and Application’s fixed update interval to 1/60. Then, in order to ensure the correct number of updates are performed, use OnFixedUpdate inside a state to drive the timers, graphics and the CPU’s fetch, decode and execute cycle:
void Chip8State::OnFixedUpdate(f32 in_dt)
{
    if(m_paused == false)
    {
        m_keyboard.UpdateKeyStates(m_state);
        m_cpu.FetchDecodeExecute(m_state);
        m_renderer.Draw(m_state);
    }
}
The above code ensures that the application runs at 60Hz but more is required to ensure the CPU executes 600 opcodes per second:
void Chip8CPU::FetchDecodeExecute(Chip8MutableState& inout_state)
{
    for(u32 i=0; i<Chip8Constants::k_opcodesPerUpdate; ++i)
    {
        auto nextOpCode = FetchNextOpcode(inout_state.m_memory, inout_state.m_programCounter);
        auto action = Decode(nextOpCode);
        //Execute decoded action which will change the chip state.
        action(inout_state);
    }
    //Timers are updated at 60Hz independently of opcodes.
    inout_state.m_delayTimer = UpdateTimer(inout_state.m_delayTimer);
    inout_state.m_soundTimer = UpdateTimer(inout_state.m_soundTimer);
    if(inout_state.m_soundTimer > 0)
    {
         CS_LOG_VERBOSE("Beep!");
    }
}
Pretty straightforward, if we know that this method executes 60 times per second then we should execute 10 opcode each time (in more complex systems this can be made more accurate using the opcode execution times from the specs).
Getting the CPU to do something…
The articles I linked to above cover opcode instructions pretty explicitly so I’m not going into detail about how to decode opcodes or what each opcode does (which is usually manipulating register data), however most the tutorials I have found online use a giant, nested switch statement to handle each opcode - this is less than ideal as it makes testing of each opcode messy (and you will need to test each opcode I can tell you).
Opcodes operate on graphics memory, standard memory, registers, the program counter and the stack; these can be combined into a struct and effectively hold the entire state of the VM. Creating a standardised opcode function signature that takes and manipulates the state allows each opcode to be implemented as a standalone function:
//Clear the screen
void x00E0(OpCode in_opCode, Chip8MutableState& inout_state)
{
    std::fill(std::begin(inout_state.m_graphicsMemory), std::end(inout_state.m_graphicsMemory), 0);
    inout_state.m_shouldRedraw = true;
    inout_state.m_programCounter += 2;
}
//Jump program to NNN
void x1NNN(OpCode in_opCode, Chip8MutableState& inout_state)
{
    inout_state.m_programCounter = C8_MASK_NNN(in_opCode);
}
//Jump to NNN and push the stack (call subroutine)
void x2NNN(OpCode in_opCode, Chip8MutableState& inout_state)
{
    inout_state.m_stack[inout_state.m_stackPointer] = inout_state.m_programCounter;
    ++inout_state.m_stackPointer;
    inout_state.m_programCounter = C8_MASK_NNN(in_opCode);
}
Now that each opcode has a functional representation it can be mapped to an opcode hex value and whenever that value is interpreted the correct function can be called. Opcodes are mapped on the first nibble i.e. 0x2000, 0x3000, etc. Rather than using a map or dictionary to pair the functions with the correct opcode I used an array and filled all the blanks in with an error function should an unknown opcode be executed:
//Fill with NoOps which are called for missing or unknown instructions
std::fill(std::begin(m_opcodeActions), std::end(m_opcodeActions), CSCore::MakeDelegate(&OpCodeActions::NoOp));
m_opcodeActions[0x00e0] = CSCore::MakeDelegate(&OpCodeActions::x00E0);
m_opcodeActions[0x00ee] = CSCore::MakeDelegate(&OpCodeActions::x00EE);
This isn’t the full story as some opcodes share the same first nibble, for example 0x8FF0, 0x8FF1, etc, and therefore will both fall through to 0x8000. 0x8000 is a routing function which checks the remaining bytes and routes to the correct function. Other routing functions include 0x0000, 0xE000 and 0xF000.
Ultimately this means there are at most 2 look-ups to find the correct function to call for an opcode.
Getting something on screen…
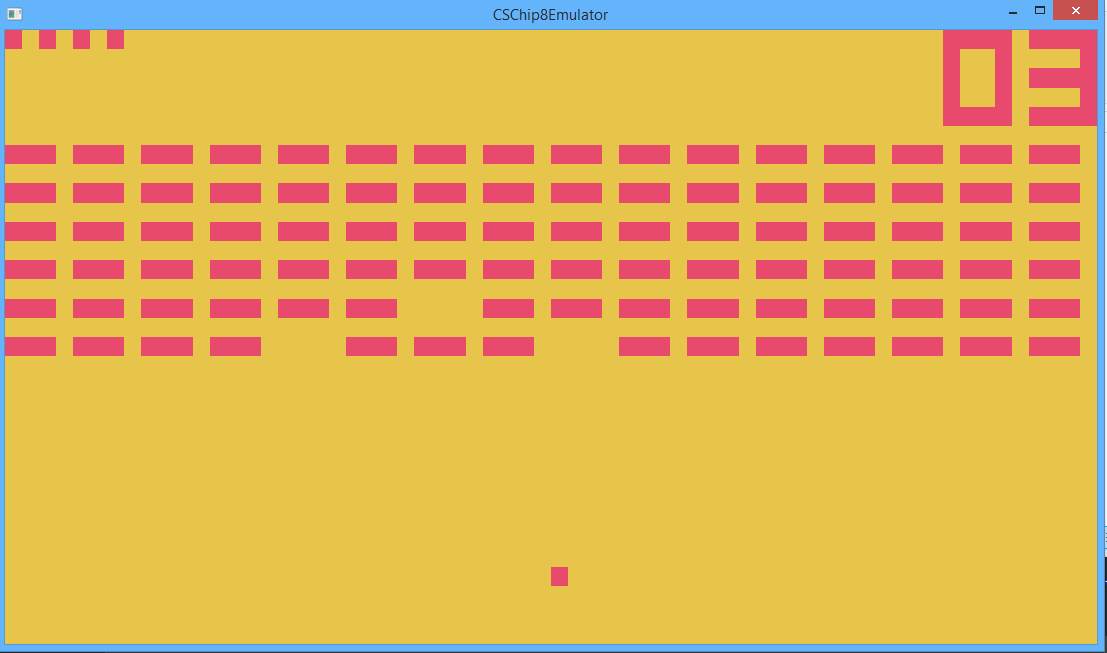
The Chip-8 has a resolution of 64x32, which is pretty small. Most tutorials recommend using glDrawPixels to blit to screen. This isn’t very platform agnostic so I prefer a more brute force approach that makes use of modern GPUs abilities to devour vertices - I create a sprite for each pixel.
Firstly I create an orthographic camera with viewport size 64x32 (in Chilli Source this defaults to fill the screen or window; this is what I want but obviously loses the aspect ratio). I then create 1x1 sprites tiled to fill the entire screen and set them to invisible. I set the scene clear colour to the desired background colour and each sprite to the desired foreground colour (in this case a garish fruit salad palette) and then simply hide and show sprites based on the graphics memory state (e.g. if gfx[1, 2] == 1 then sprite[0, 2] = visible). Simple!
Getting user input…
Weirdly the Chip-8 has a hex keyboard (yep. 16 keys labeled 0 - F). Feel free to map these to a QWERTY keyboard any way you wish but I chose the following and used the Chilli-Source keyboard system to fetch the user input:
void Chip8Keyboard::UpdateKeyStates(Chip8MutableState& inout_state)
{
    if(m_keyboard != nullptr)
    {
        inout_state.m_keyState[0] = (u8)m_keyboard->IsKeyDown(CSInput::KeyCode::k_num1);
        inout_state.m_keyState[1] = (u8)m_keyboard->IsKeyDown(CSInput::KeyCode::k_num2);
        inout_state.m_keyState[2] = (u8)m_keyboard->IsKeyDown(CSInput::KeyCode::k_num3);
        inout_state.m_keyState[3] = (u8)m_keyboard->IsKeyDown(CSInput::KeyCode::k_num4);
        inout_state.m_keyState[4] = (u8)m_keyboard->IsKeyDown(CSInput::KeyCode::k_q);
        inout_state.m_keyState[5] = (u8)m_keyboard->IsKeyDown(CSInput::KeyCode::k_w);
        inout_state.m_keyState[6] = (u8)m_keyboard->IsKeyDown(CSInput::KeyCode::k_e);
        inout_state.m_keyState[7] = (u8)m_keyboard->IsKeyDown(CSInput::KeyCode::k_r);
        inout_state.m_keyState[8] = (u8)m_keyboard->IsKeyDown(CSInput::KeyCode::k_a);
        inout_state.m_keyState[9] = (u8)m_keyboard->IsKeyDown(CSInput::KeyCode::k_s);
        inout_state.m_keyState[10] = (u8)m_keyboard->IsKeyDown(CSInput::KeyCode::k_d);
        inout_state.m_keyState[11] = (u8)m_keyboard->IsKeyDown(CSInput::KeyCode::k_f);
        inout_state.m_keyState[12] = (u8)m_keyboard->IsKeyDown(CSInput::KeyCode::k_z);
        inout_state.m_keyState[13] = (u8)m_keyboard->IsKeyDown(CSInput::KeyCode::k_x);
        inout_state.m_keyState[14] = (u8)m_keyboard->IsKeyDown(CSInput::KeyCode::k_c);
        inout_state.m_keyState[15] = (u8)m_keyboard->IsKeyDown(CSInput::KeyCode::k_v);
    }
}
Getting it to make some noise…
The Chip-8 can only make a single, annoying, beep. If you check out the code in the timing section you should see that there is a sound timer that counts down at 60Hz. A couple of the online references get this wrong and it tripped me up too - the specs state that while the timer is greater than zero the beep plays. Not when the timer reaches zero, which is what a few of the online tutorials do. This makes things slightly harder as you have to either find a looping beep sound or a beep sound that’s duration is greater than 4.25 secs (timer max. is 255 and one is deducted 60 times a second) and then stop and start it based on the sound timer.
Getting the source code…
Now that I have cut my teeth on the Chip-8 I’ll move onto something a bit more meaty - probably the Gameboy or Master System. I’m going to finish off the Chip-8 emulator by adding a ROM picker and pause/reset buttons with the CS UI system.
Feel free to browse through the source code to check out how to implement all the opcodes CSChip8Emulator